Free Motion Quilting on a Domestic Sewing Machine: The Complete Guide for Home Quilters
What Free Motion Quilting Actually Is (and Why It's Not as Scary as It Looks)
Free motion quilting can look a little wild from the outside. Stitches going every direction, swirls and loops appearing on a quilt top like magic. If you’ve ever watched someone do it and thought “there is no way I could pull that off,” you’re in good company. I felt the same way the first time I tried it.
Here’s what’s actually happening. Free motion quilting, or FMQ for short, is what you get when you drop your sewing machine’s feed dogs and steer the fabric yourself. Without the feed dogs pulling the fabric through, you decide where every stitch goes. Forward, backward, sideways, in a curve, in a loop, in a heart, in a star. The needle does its job. You do the steering.
That’s the whole secret. The same machine that sews a perfectly straight seam can stitch every quilting design you’ve ever admired. It’s not a different machine. It’s not some hidden talent. It’s a different setup and a little practice.
Most quilters get nervous because free motion quilting feels improvisational. After years of letting the machine guide your fabric in a tidy straight line, suddenly you’re the one in charge of every direction change. That can feel uncontrolled at first. The good news? Control comes back fast. Way faster than you’d think.
This whole guide is for quilters who want to learn free motion quilting on the sewing machine they already own. No longarm. No special quilting machine. Just your domestic machine, a few simple supplies, and a willingness to start with something small. If that’s you, you’re in exactly the right place.
Why a Domestic Sewing Machine Works (and Where Its Limits Really Are)
Maybe you've already had this thought. "Sure, but everyone who quilts like that has a longarm." I hear it all the time, usually right before someone tells me she's been saving her finished tops for the day she can finally afford one. I get it. For years I assumed the good quilting happened on machines that cost more than my first car.
It doesn't. The machine you already own can free motion quilt beautifully, and FMQ on a domestic machine comes with real advantages a longarm can't touch.
You sit right up close to your work. You can stop mid-stitch, smooth out a pucker, check the back, and start again. Small and medium quilts are right at home under that needle, baby quilts, throws, wall hangings, table runners. And you don't need a spare room or a second mortgage. Just the corner where your machine already lives.
Now, the honest part. Domestic machines have limits, and pretending otherwise wouldn't be very best-friend of me.
Your throat space, the opening to the right of the needle, is smaller than a longarm's. That means a big quilt has to be rolled and wrangled to fit through it. I won't pretend a king-size quilt on a domestic machine is a breeze. But it is absolutely doable, and I'll prove it. That's me below, quilting a king-size quilt on my regular old domestic machine.
Some older machines also don't have a true free motion mode, so it's worth checking yours before you start. None of that should stop you. You start small, you build up, and when you're ready for the big stuff, I've got a whole guide on how to quilt a big quilt on a small machine.
So let's talk about what you actually need to get started, because the list is shorter than you think.
Free Motion Magic
Master free motion quilting before you even sit down at your sewing machine.
The Supplies You Actually Need (and the Ones the Internet Will Try to Sell You)
The quilting industry sells $5 billion worth of stuff every year. I can help you build a free motion quilting toolbox for about $50. Add another $20 or so for batting, and you’re ready to quilt your first quilt.
After 25 years, these are the tools I reach for every time I quilt a quilt. I'd be lost without them when it's time to put thread to sandwich.
Definitely Need
Before I ever sit down at the machine, I doodle the design I'm about to quilt. A few minutes with a pen on paper builds the muscle memory my hands will use under the needle. It's the cheapest, easiest skill builder in quilting.
When it's time to mark any stitching lines, the Hera marker is my favorite tool. You rub it over your fabric to press in a crease. It also doesn’t involve any ink that “washes out” that could take a good quilt down. I’ve heard too many horror stories to take the risk.
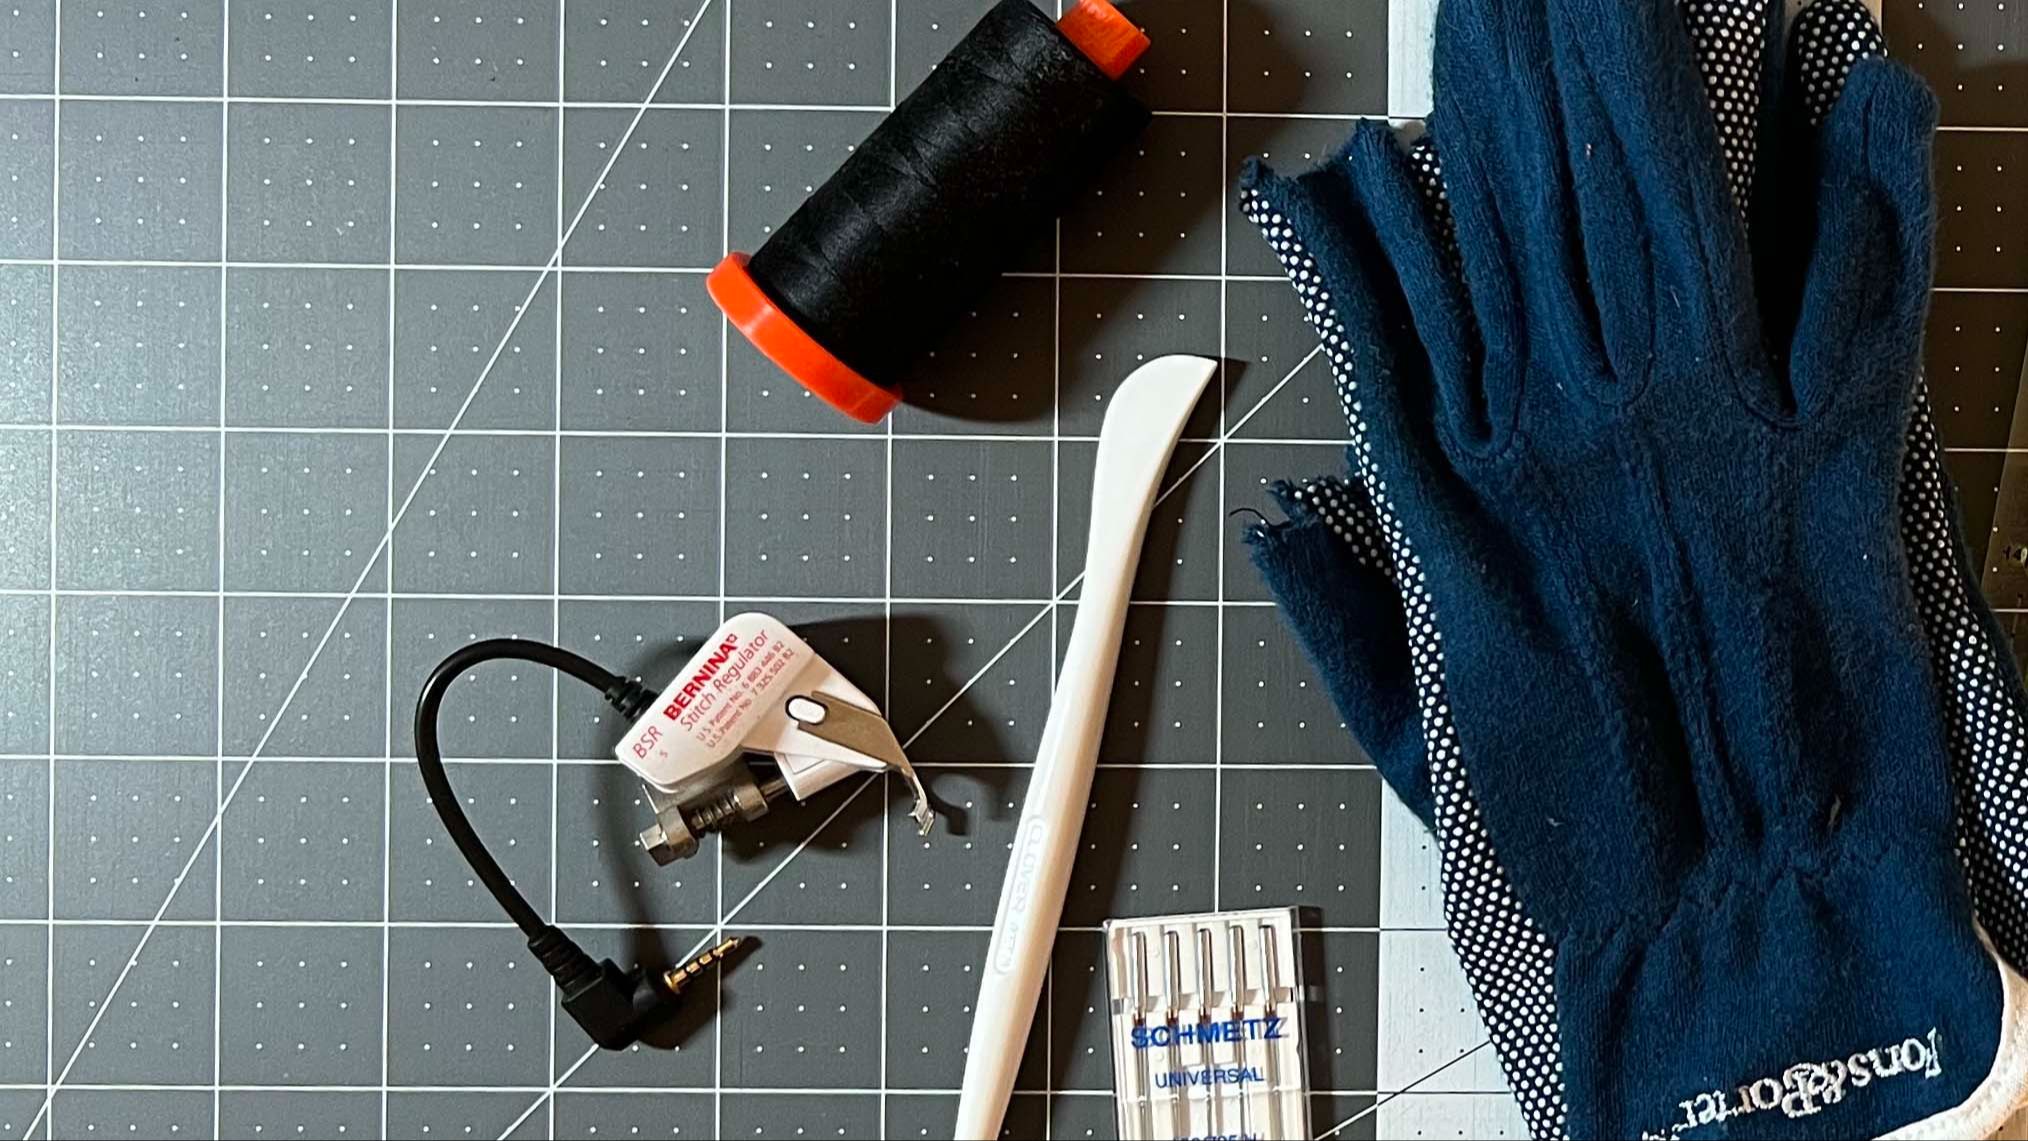
My go-to needle is the Schmetz 70/10 with the green band. I use it for piecing, quilting, and binding, and it has never skipped a stitch.
I keep my thread simple, so I'm never guessing. Aurifil 50 weight does nearly all my stitching, top and bobbin, and Dove Gray (2600) is my piecing favorite because it disappears into most fabrics. The best thread is the one that runs through your machine without fighting you. If a variegated spool is calling your name, here's how to keep it from going muddy.
I cannot quilt without grippy gloves. They give you real control of the quilt sandwich and keep your hands from cramping. I snip the tips off the thumbs and index fingers, so I can trim threads, change a bobbin, or rethread the machine without taking them off.
I love Warm and Natural batting so much that I buy the 20-yard roll and cut off what I need for each project. It’s easy to work with and gives my quilts a great crinkly look after its first wash. (It also comes in packages of standard quilt sizes if you don’t want to start so hardcore.)
Finally, I throw a couple of Color Catchers in with the finished quilt's first wash. They soak up any stray dye, so a color run can't ruin the work I just put in. I don’t pre-wash my fabric, so this is always a fear for me. Besides, I would rather be quilting than doing laundry.
Definitely Skip
The quilting world is full of tools that look helpful and turn out to be money you didn't need to spend. Here's what I've happily lived without.
- Quilting frames. Interesting, but impractical.
- Slider sheets. Way too complicated for a job your grippy gloves already do.
- Wash-out and iron-out markers. Too many horror stories of marks that refused to leave.
- Stencils for drawing your design first. If you've doodled the design, you're good.
See all the details in my must-have quilting supplies blog post. There’s a link for each one to make it easy to build your toolkit.
Next up, let's get that machine set up to actually stitch.
Setting Up Your Machine for Free Motion Quilting
If setting up your sewing machine for free motion quilting sounds daunting, I get it. The first time I went hunting for the free motion settings on my machine, I was sure I'd push the wrong button and void the warranty. I didn't. You won't either.
Here's the whole thing, start to finish.
First, drop your feed dogs. Those are the little teeth under the needle that pull your fabric through in a straight line. There's usually a switch or a lever to lower them. If your machine won't drop them, you can cover them with a plate or even a strip of tape and quilt right over the top.
Next, put on your free motion foot. It might be called a darning foot or a quilting foot, and it hops just above the fabric instead of pressing it flat. That little hop is what lets you move the quilt in any direction you like.
Now forget about stitch length. You're steering the fabric yourself, so the length setting doesn't do a thing. The speed of your hands sets the stitch.
Which brings up the part that trips up almost everyone. Tension. If your stitches look loopy on the back, your top tension usually needs to come down a notch. Test, adjust, test again. Most quilting problems that feel like a disaster are really just a tension tweak.
One last rule, and it's the one I'd tattoo on a quilter if I could. Always test on a practice sandwich first. Never the real quilt. Two scraps of fabric with a bit of batting between them, every single time, before you touch the quilt you love.
That's your machine, set and ready. Now let's talk about how to quilt a design you're actually proud of.
The Learn, Doodle, Quilt Method
Most quilters who struggle with free motion quilting aren't missing talent. They're missing a step. They sit down at the machine, put the needle to a quilt they spent months piecing, and try to invent the design in real time. Then it wobbles, and they decide they're just not good at this.
I did the exact same thing. For years I was sure the quilters with beautiful quilting had steadier hands than mine. They didn't. They had a process. Once I found mine, everything changed.
Here it is. Learn, Doodle, Quilt. Three steps, in that order, every single time.
Learn
Before you draw a single line, look at the design and understand how it's built. Where does the line start? Where does it double back? What gives it its rhythm? A swirl stops being a mystery the moment you see it's just a line curling in and then tracing its way back out. When you understand the path, your hand isn't guessing anymore. It's following something it already knows.
Doodle
Now draw it. On paper, with a pen, away from the machine entirely. This is the step everyone wants to skip, and it's the one that matters most. Doodling builds the muscle memory your hands will use under the needle, with no quilt on the line and none of the noise of the machine. Draw the design until your hand can make it without you thinking hard about it. Fill a page. Fill ten. (I wrote a whole post on the power of doodling if you want to go deeper.)
Quilt
By the time you sit down at the machine, the design is already in your hands. You're not inventing anything. You're repeating something you've done a hundred times on paper, just with thread instead of ink. That's the whole difference between quilting that fights you and quilting that flows.
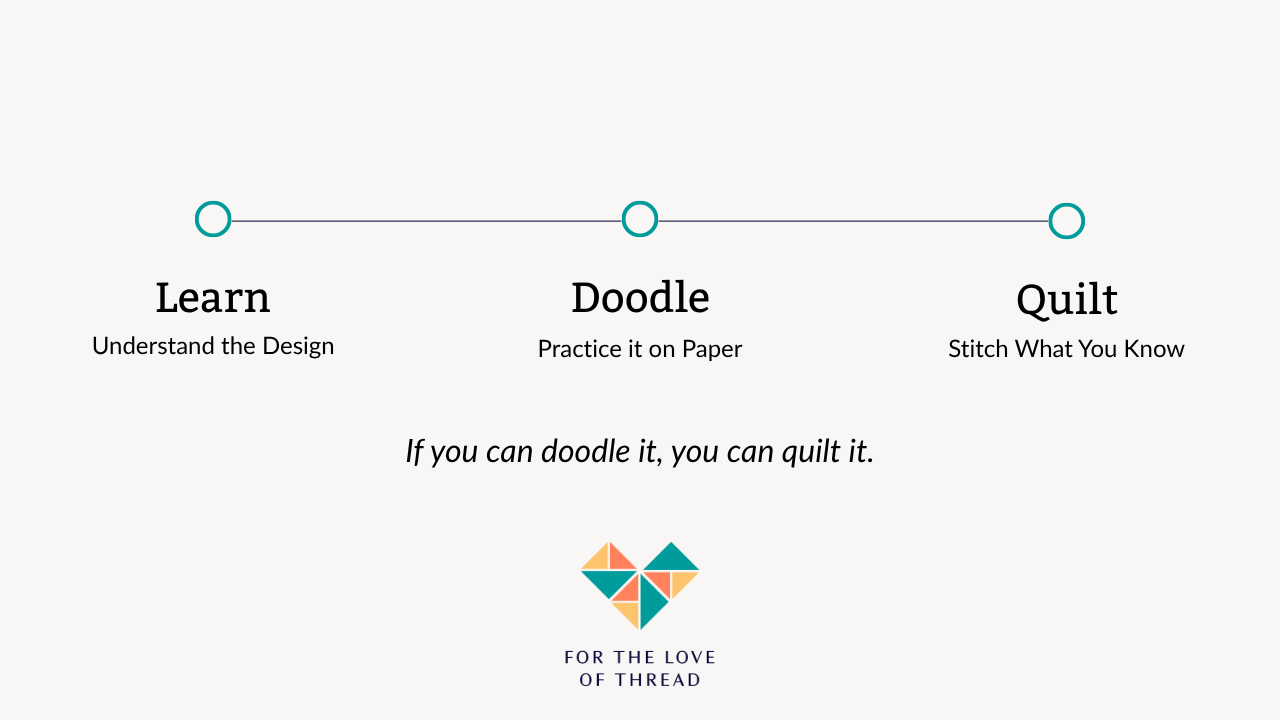
If you remember one thing from this whole guide, make it this. If you can doodle it, you can quilt it.
This is exactly how I teach every design in my classes, one small step at a time. It's the method behind my free FMQ 101 class, the FMQ Starter Pack, FMQ Swirls, and every class after. If learning free motion quilting properly with me sounds good, that's the path, and I'll map the whole thing for you near the end of this guide.
Next, let's pick the designs to start with, because not all of them are equally friendly to a beginner.
The Free Motion Quilting Designs Every Beginner Should Learn First
You don't need fifty designs to start quilting your own quilts. You need a small handful that can cover any quilt you put under the needle. These four are exactly that.
Haven't set your machine for free motion quilting yet? Start with FMQ 101. It's free, and it teaches you how to get set up and succeed before you sew a single stitch.
Loopy Meander
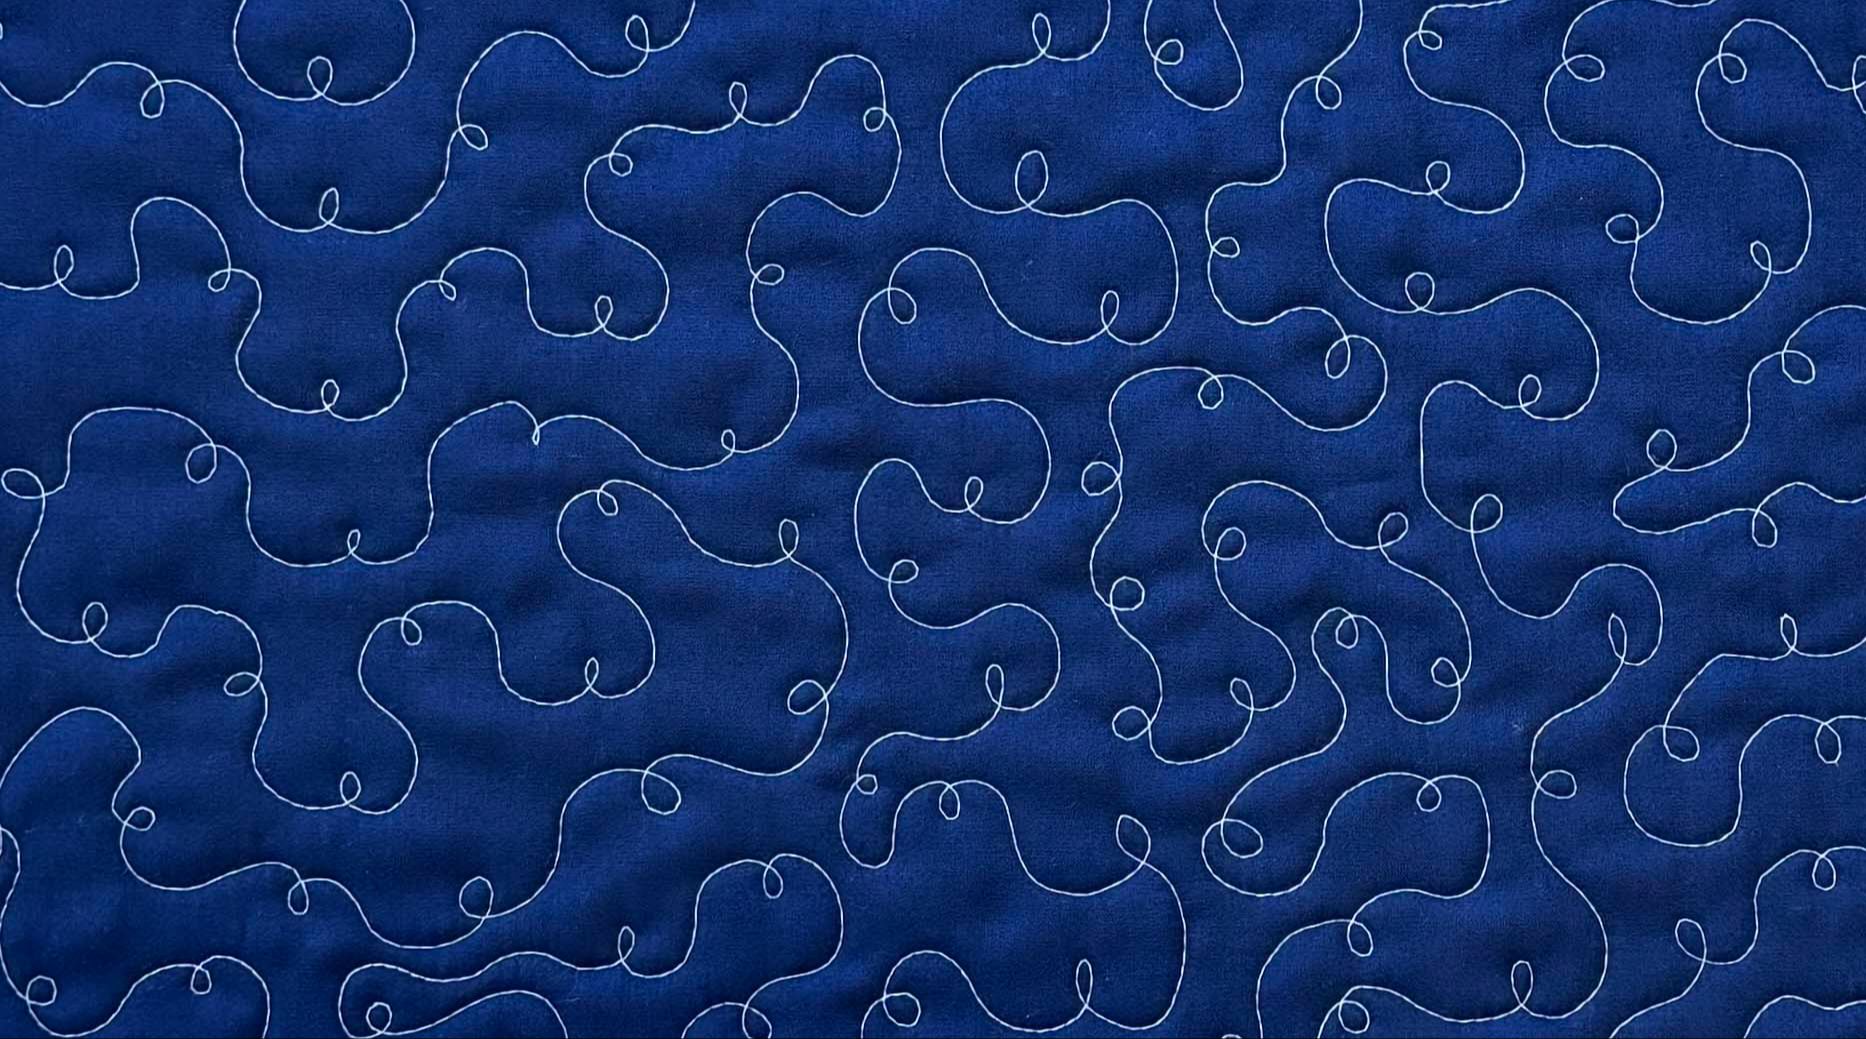
Start here, because it's the friendliest all-over design on the list. A loopy meander is meander's fancy first cousin. A plain meander wanders around the quilt without ever crossing its own stitching line. A loopy meander breaks that rule on purpose and throws in a loop every so often. Those loops actually make it more forgiving to stitch, and they add a softer, more feminine flair. It fills a whole quilt top edge to edge, no planning required.
Switchbacks
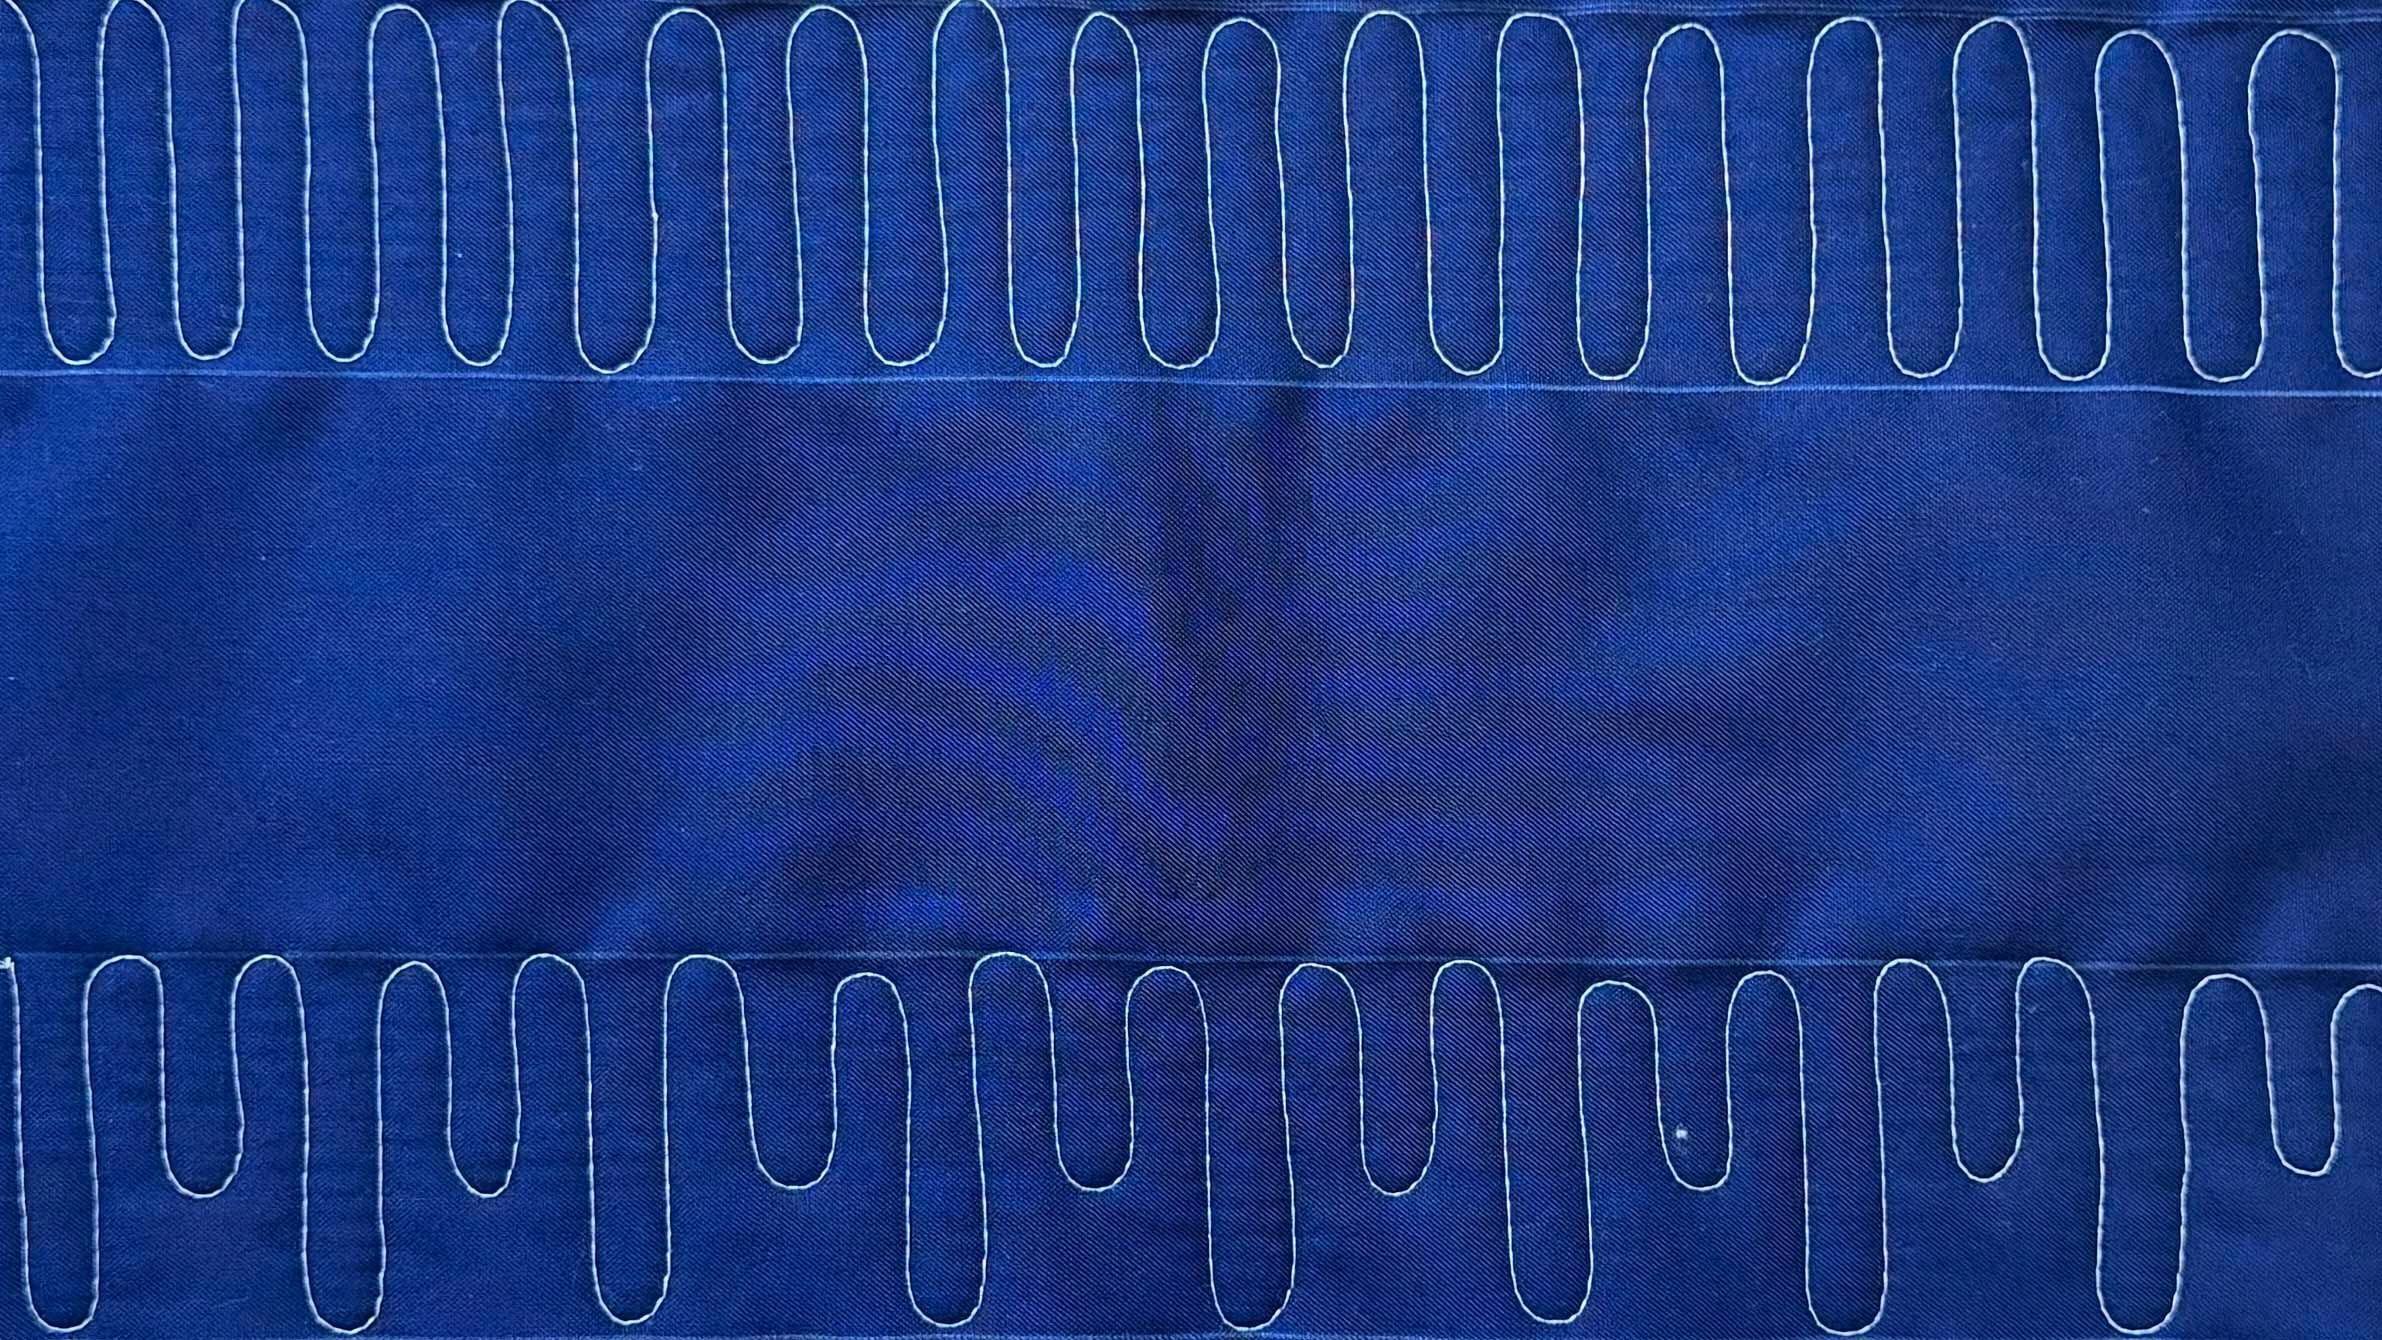
Switchbacks are for your borders and sashing. You sew up and down in a steady motion while traveling sideways along the strip, like a road switching back on itself up a hill. My tip for keeping them evenly spaced is to let your presser foot do the measuring. Line the edge of the foot against your last line of stitching, and every pass lands the same distance from the one before it. No marking required.
Wishbone
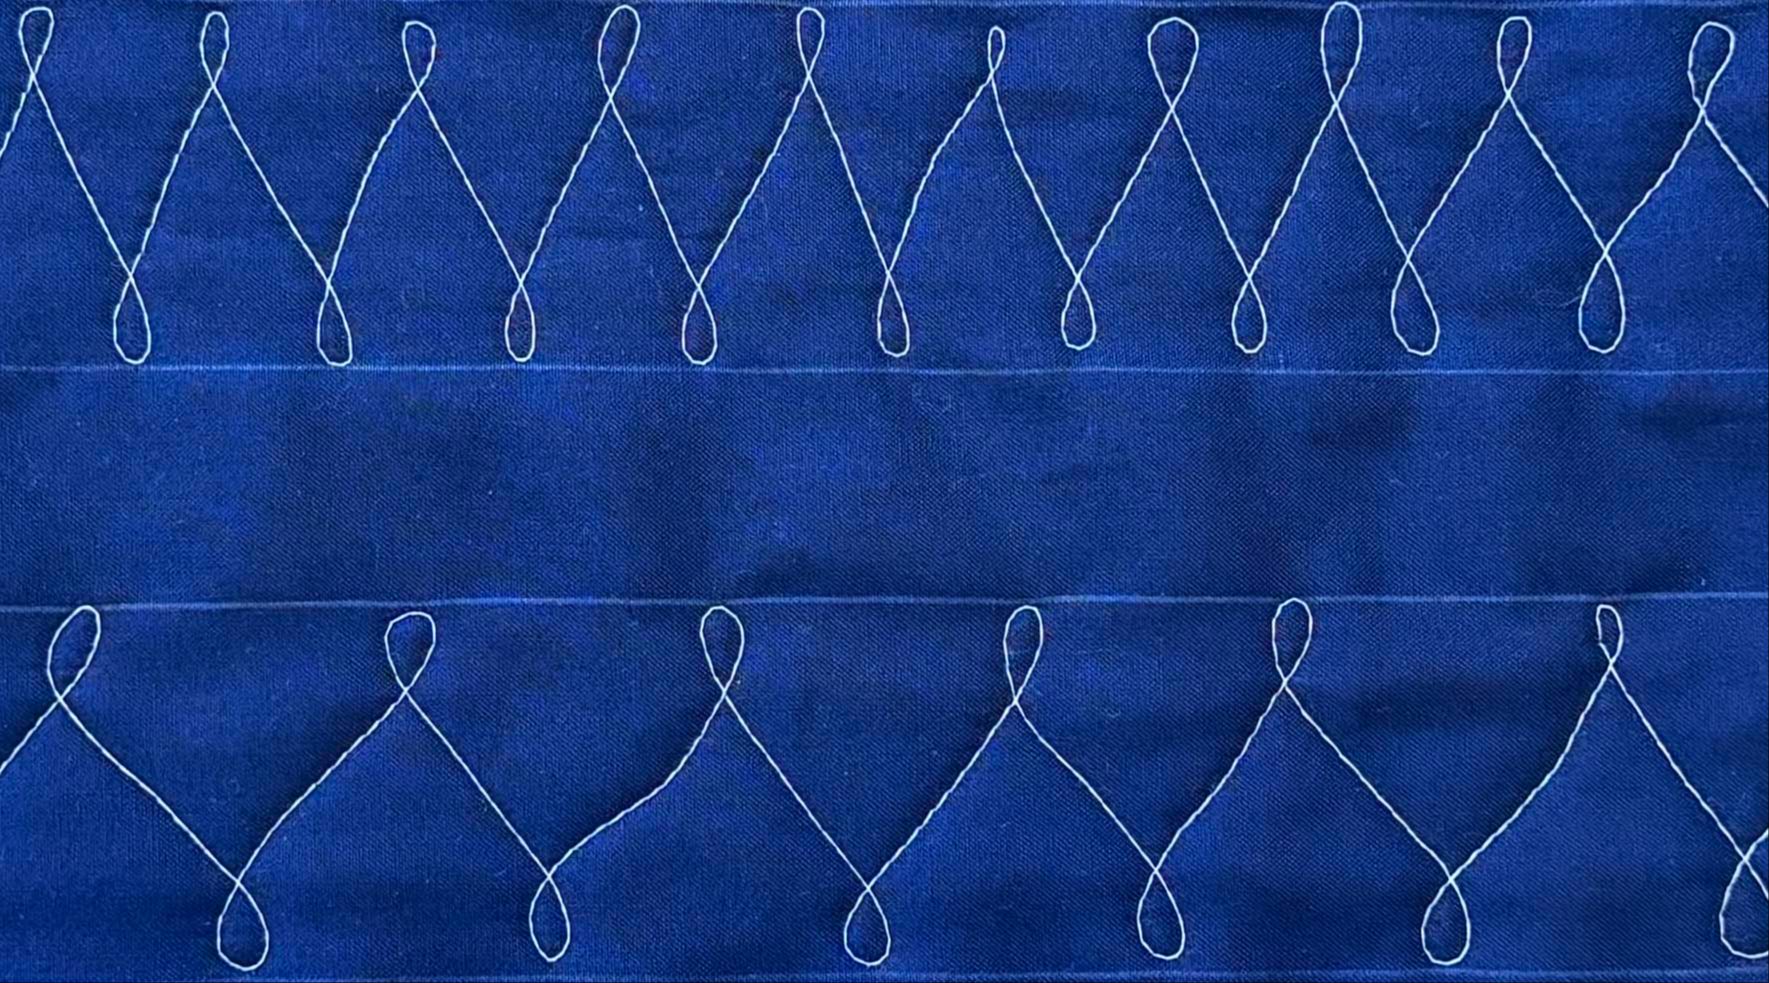
Wishbone looks exactly like its name, the bone you pull apart after Thanksgiving dinner. It's another design made for borders and sashing, a row of soft, curved wishbones traveling down the strip. That gentle curve keeps it forgiving, and it dresses up a plain sashing strip without asking much of you.
Bowtie
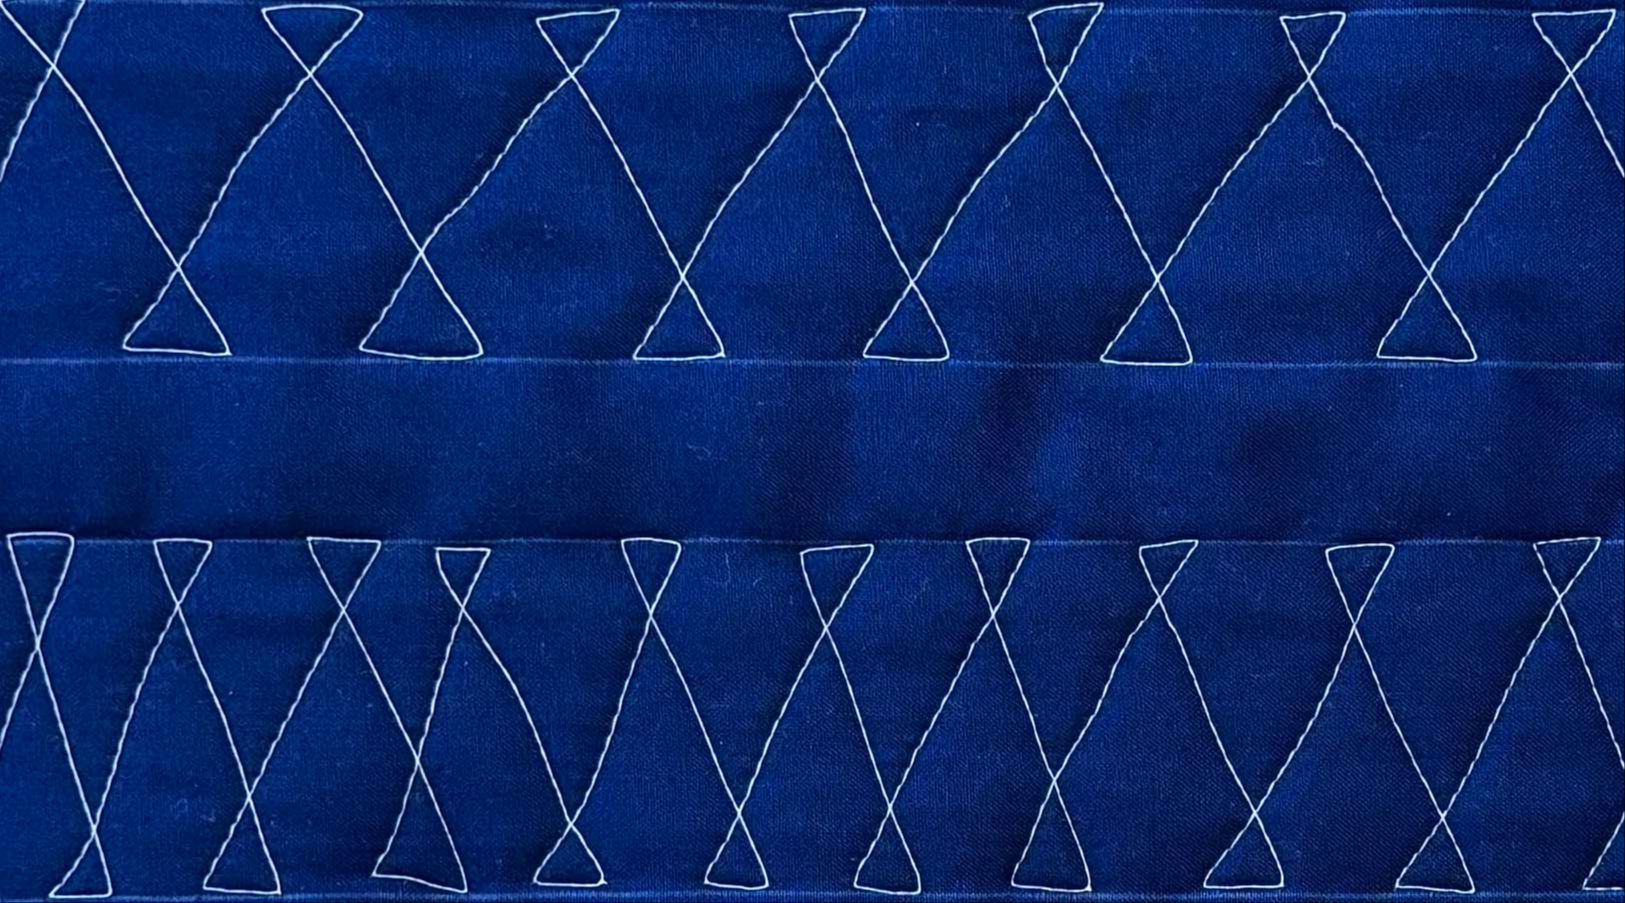
Bowtie is wishbone with sharper shoulders. Same travel down a border or a sashing strip, but angular instead of curved, which gives it a crisper, more masculine touch. Reach for it when a quilt wants a little structure instead of softness.
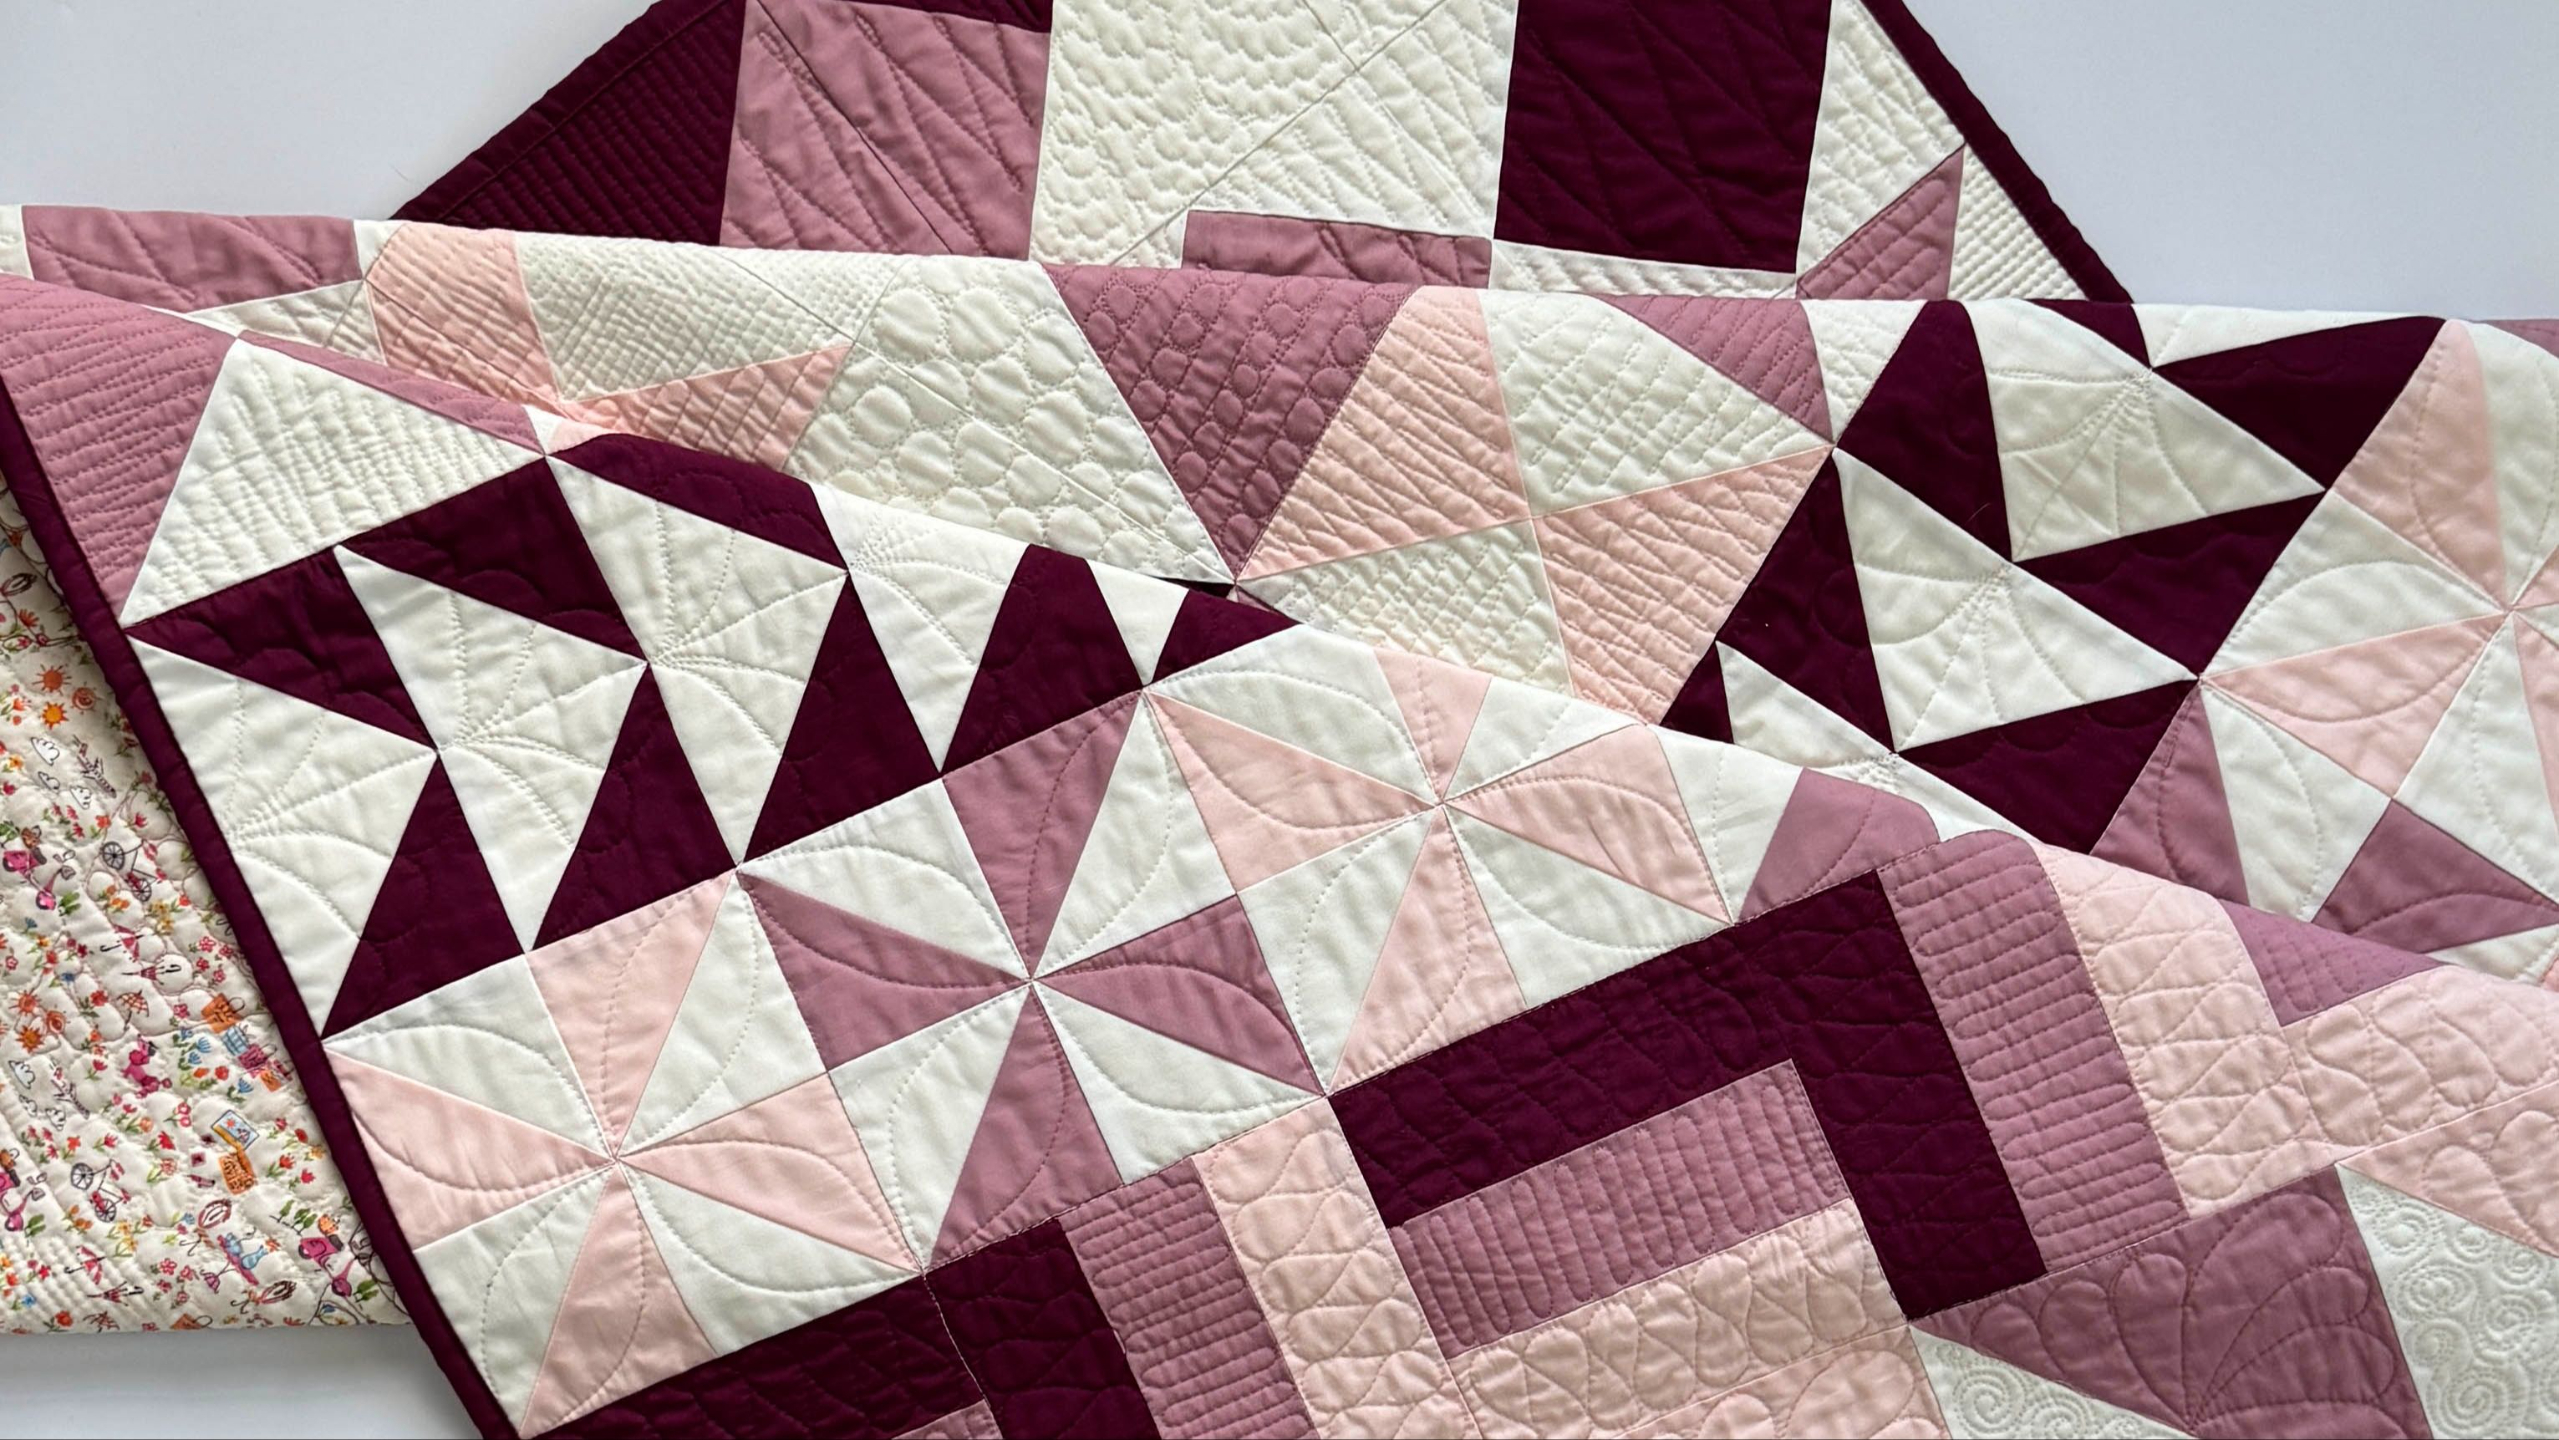
Here's why these four. One is an all-over design that fills any open space. The other three are built for borders and sashing. Add them to the plain meander you already learned in my free FMQ 101 class, and you have a small set that covers almost any quilt you'll ever make. All-over fields, borders, and sashing. That combination is what lets you semi-custom quilt a top, treating different parts of the quilt differently, no matter how the top is pieced.
All four of these live in my FMQ Starter Pack class, taught with the Learn, Doodle, Quilt method from the last section.
Once you've picked a design to practice, it helps to know the bumps coming. Next up, the most common free motion quilting mistakes and how to fix them.
Common Free Motion Quilting Mistakes (And How to Fix Them)
Every free motion quilter hits these bumps. I hit all of them, some more than once. The good news is that each one has a fix, and not one of them means you're bad at this. They just mean you're learning.
Your Stitches Are All Different Sizes
Some stitches come out tiny, the next ones huge. Uneven stitches happen when your hands and your machine aren't moving at the same pace. The fix is to slow your machine down and stop driving your hands like you're in a NASCAR race. Find a calm, steady speed and move your hands to match it. Just like the turtle, slow and steady wins the quilt.
There’s a Bird’s Nest on the Back
You flip the quilt over and find a tangled mess of thread loops. A bird's nest can come from a few places. It could be your tension, it could be moving too fast, or it could be a threading problem on top or in the bobbin. Rethread the whole machine, top and bobbin, and check your tension before you blame yourself. Tension is the number one frustration in free motion quilting, so if it keeps happening, my tension post walks you through it on a deeper level.
Your Curves Have Pointy Corners
Your curves keep coming out with sharp little points instead of rounding off softly. This one is usually one of two things. Either your body is tense, shoulders up around your ears, and that stiffness travels right into your stitching. Take a deep breath and drop your shoulders. Or you didn't doodle the design enough before you sat down, so your hands are still working out the path. Back to paper for a few minutes, then try again.
You Bought a New Machine Before Mastering This One
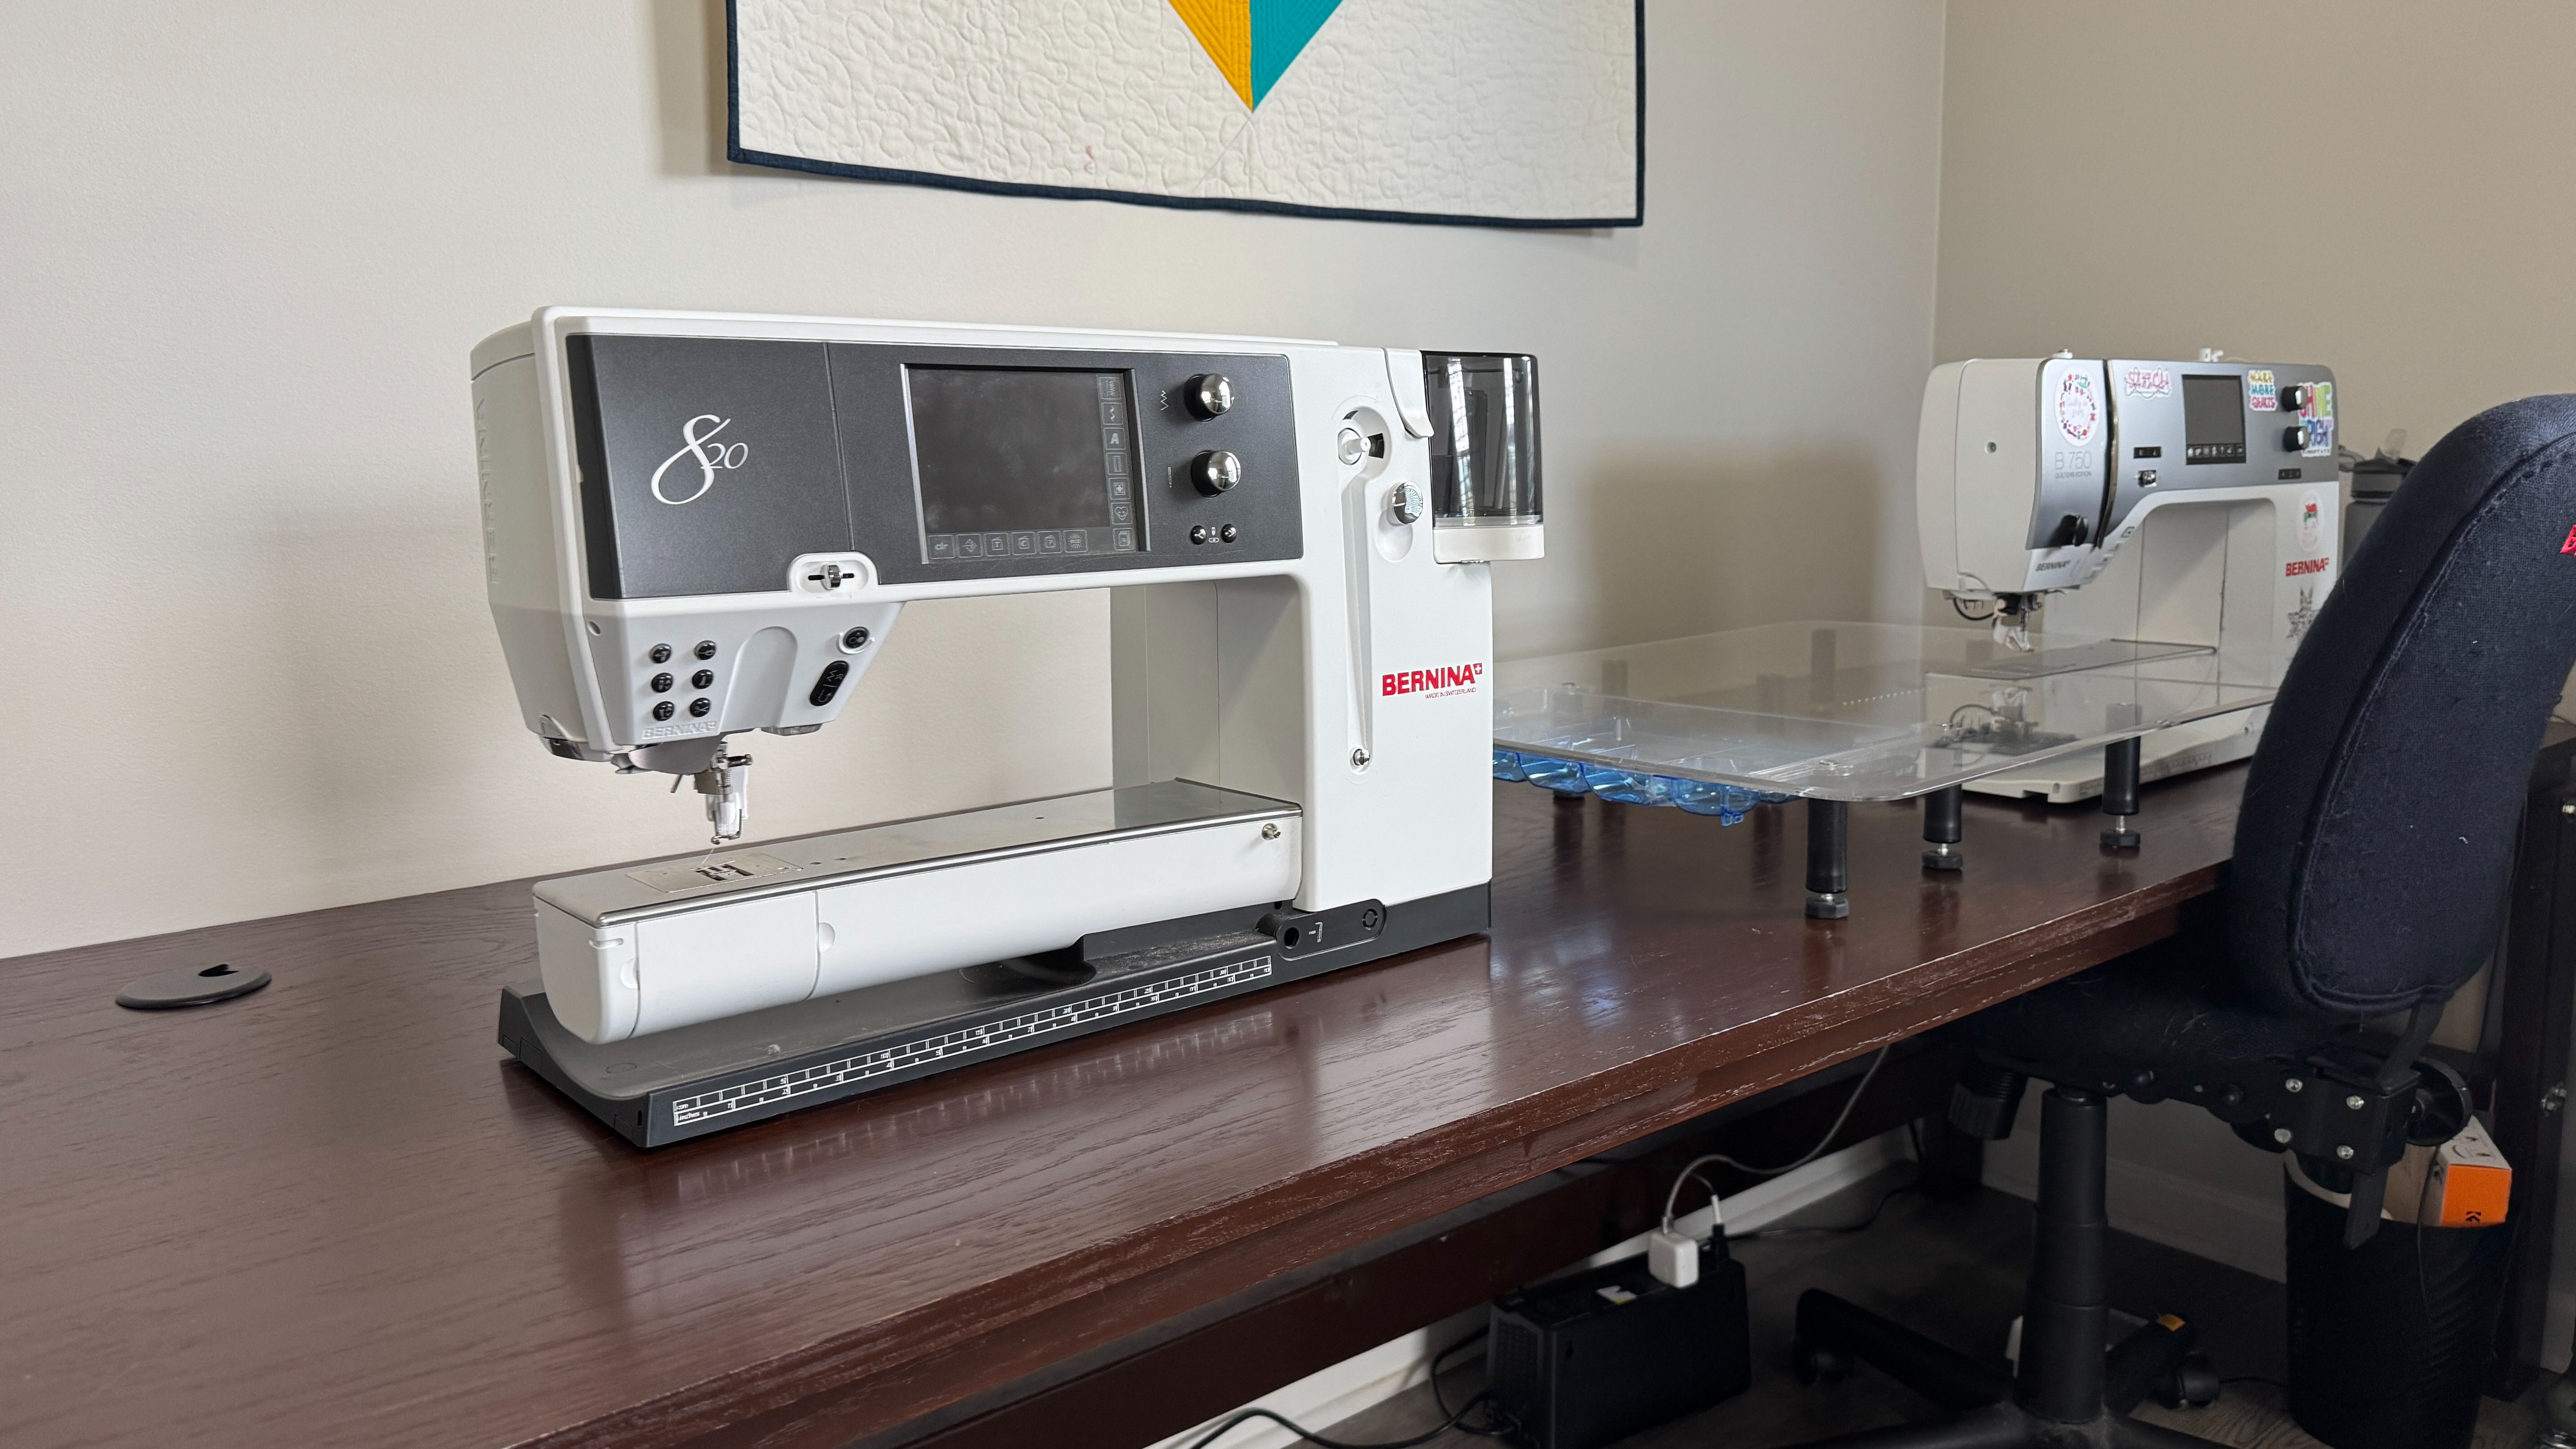
When quilting feels hard, it's easy to decide the machine is the problem. It almost never is. The machine you already own can do beautiful free motion quilting. Spend the money you'd put toward a new one on thread and practice sandwiches instead, and master what's in front of you first.
Notice how many of these come back to the same cure. Practice, the right kind. Let's talk about how to do that without wasting your time.
How to Practice Free Motion Quilting the Right Way
Getting better at free motion quilting comes down to two small habits, and neither one takes much time.
10-Minute Rule
Doodle your designs for ten minutes a day. A pen and any scrap of paper, that's all it takes. It's the cheapest, most portable practice there is. You can do it at the kitchen table, in the carpool line, or in front of the TV. Ten minutes a day will make you a better quilter than one long session ever could, because your hands learn the path a little more each time.
Practice Sandwiches
Once a week, take what you've been doodling over to the machine. I make mine about 18 by 22 inches, the size of a fat quarter, with a scrap of batting in the middle. You don't need new fabric for this. We all have something in our stash we've outgrown, and this is its perfect second life. Plain muslin cut to the same size works too.
Here's the part nobody tells you. Practice sandwiches are supposed to be messy. That's the whole point. Use high contrast between your fabric and thread, light fabric with dark thread or the other way around, so you can really study your stitches. And repeat after me. We are not turning these into pillows. They are for practice.
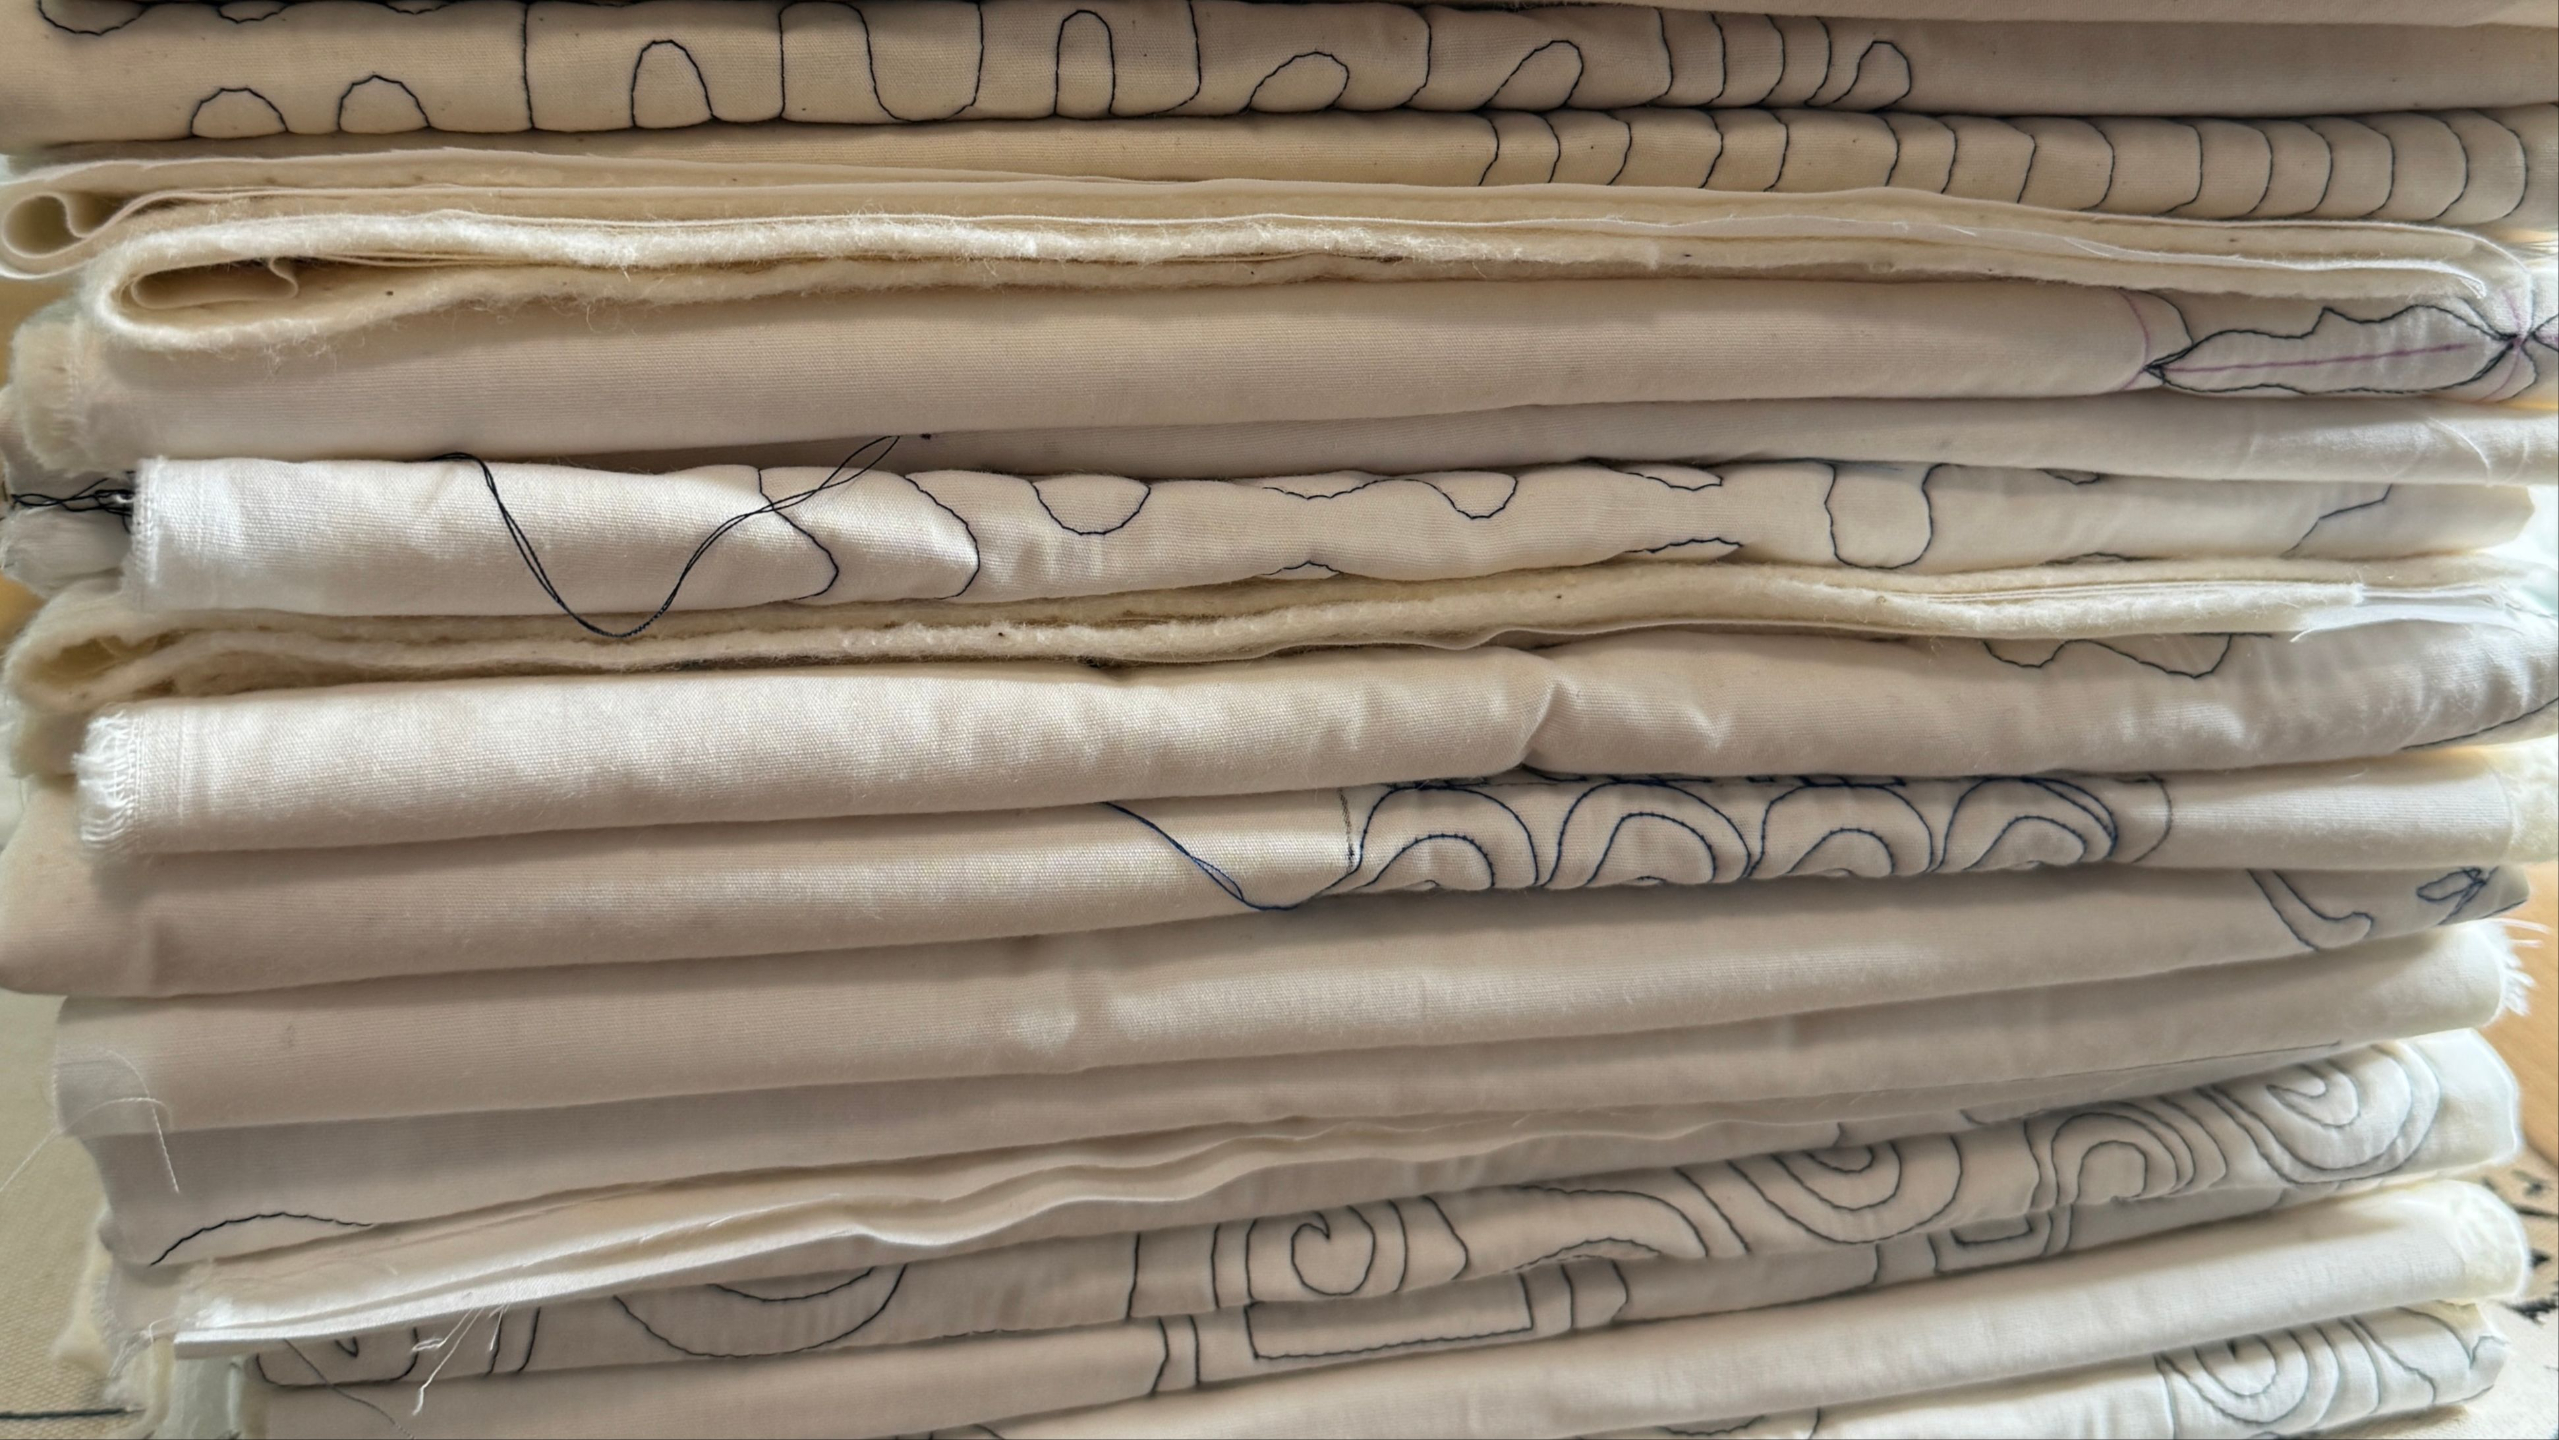
I've kept nearly every practice sandwich I've ever made, and I love flipping back through the pile to see how far my quilting has come. Yours will tell that same story sooner than you think.
Want somewhere for those ten minutes to go? My free FMQ 101 class comes with a workbook and a traceable doodle sheet built right in.
Next, let's map out where to take all of this, from your first practice sandwich to quilting with real confidence.
Where to Go from Here: the FMQ Learning Path
Free motion quilting isn't one big leap. It's a handful of small, doable steps, and here's the path I'd walk you down, in order.
Start
For the quilter who hasn't quilted her own top yet. Begin with FMQ 101, my free class. It gets your machine set up the right way and teaches your first design, the meander, before you ever sew a stitch. From there, the FMQ Starter Pack adds four more designs, one all-over plus three for borders and sashing, so you can quilt a whole top edge to edge and semi-custom quilt almost any layout.
Build
For the quilter who has the basics down and wants more designs in her hands. FMQ Swirls is the natural next step after the Starter Pack. You'll learn one swirl design and four variations, five new designs in all, taught with the Learn, Doodle, Quilt method. By the end, swirls will feel like second nature.
Stretch
For the quilter ready to push past the basics. FMQ Flora & Fauna steps the skill up a notch with five floral inspired designs that give your quilts a softer, more custom look.
Apply
For the quilter ready to make the quilting itself the star of the show. WholeCloth Draw isn't a quilt pattern. It's a quilting pattern, where the free motion designs are the whole design, from city skylines to scenes from nature. The line arrives in February 2027, and you can be the first to know when it's ready.
Join the Waitlist
Be the first to hear about the new WholeCloth Draw quilting patterns.
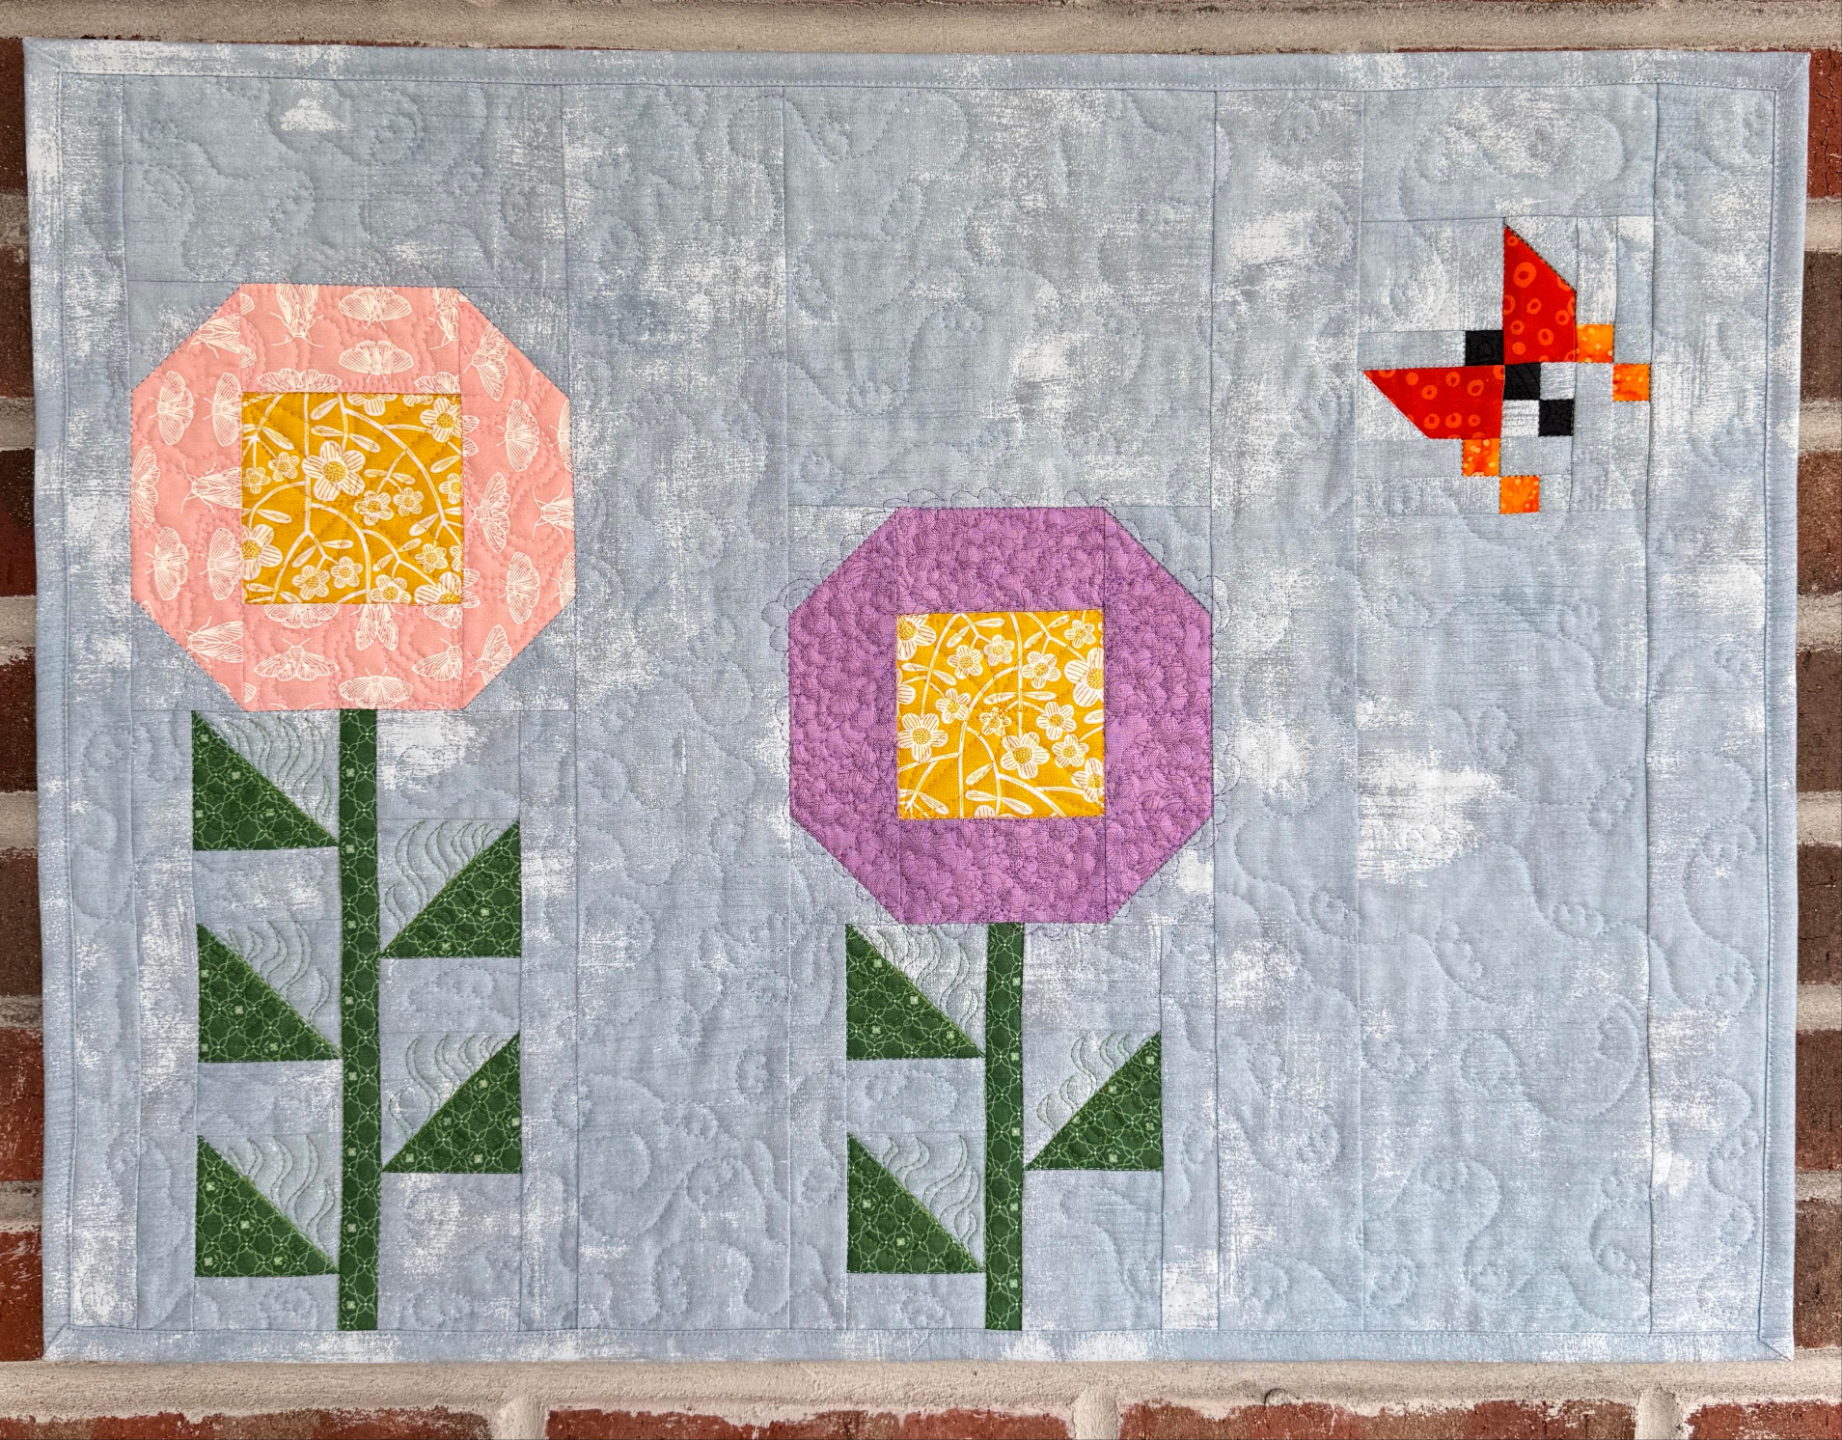
Every paid class comes with a bonus pattern. Each one is built to put the designs you just learned into a real quilt, a smaller wall hanging up to 18 by 24 inches. Small enough to maneuver under your machine, and adorable enough to make you want to hang it by the front door. The Starter Pack comes with Gifted Quilt, which looks like a wrapped present, fitting, since you just gave yourself the gift of four new designs. Finish Line is the featured pattern for FMQ Swirls. FMQ Flora & Fauna comes with Butterfly Garden, two beautiful flowers to fill with your new floral designs and a sweet pieced butterfly stopping in for a treat.
Not sure where you land? Don't overthink the ladder. Start at the bottom with FMQ 101. It's free.
Still have a few questions rattling around? I've answered the ones I hear most, right below.
Frequently Asked Questions
Can I free motion quilt on any sewing machine?
Do I need to drop my feed dogs, or can I cover them?
What's the difference between free motion quilting and walking foot quilting?
How long does it take to free motion quilt a quilt?
Will free motion quilting damage my machine?
Why are my stitches uneven?
Do I need quilting gloves?
What's the easiest free motion quilting design for absolute beginners?
How do I keep tension from puckering my quilt?
Can I free motion quilt on a longarm?
I made a mistake in my quilting. How do I fix it?
How do I get my quilting perfect?
You're Closer Than You Think
If you've read this far, you already have what it takes. Free motion quilting was never about talent or a fancy machine. It's a skill, and skills are learnable. The machine already sitting on your table is enough. Your hands will catch on faster than you think, wobbles and all.
So don't wait for the perfect setup or the perfect moment. They aren't coming, and you don't need them. You need ten minutes, a doodle, and the willingness to begin.
Start with FMQ 101. It's free, and it's the exact place every student in my paid classes began. I'll see you at the machine.